MainActivity
<?xml version="1.0" encoding="utf-8"?>
<androidx.drawerlayout.widget.DrawerLayout
    xmlns:android="http://schemas.android.com/apk/res/android"
    xmlns:app="http://schemas.android.com/apk/res-auto"
    xmlns:tools="http://schemas.android.com/tools"
    android:layout_width="match_parent"
    android:layout_height="match_parent"
    tools:context=".MainActivity">


    <LinearLayout
        android:layout_width="match_parent"
        android:layout_height="match_parent"
        android:background="@color/colorPrimary">

        <TextView
            android:layout_width="match_parent"
            android:layout_height="match_parent"
            android:gravity="center"
            android:textSize="60sp"
            android:text="메인 액티비티"/>

    </LinearLayout>

    <com.google.android.material.navigation.NavigationView
        android:id="@+id/nav1"
        android:layout_width="wrap_content"
        android:layout_height="match_parent"
        app:menu="@menu/nav_menu"
        android:layout_gravity="start|left"/>

</androidx.drawerlayout.widget.DrawerLayout>
무조건! 리니어 레이아웃 아래에 배치
레이아웃 위치에 따라 작동 여부가 되는 경우가 있고 안되는 경우가 있다
---------------
headerLayout = 유저 정보
---------------
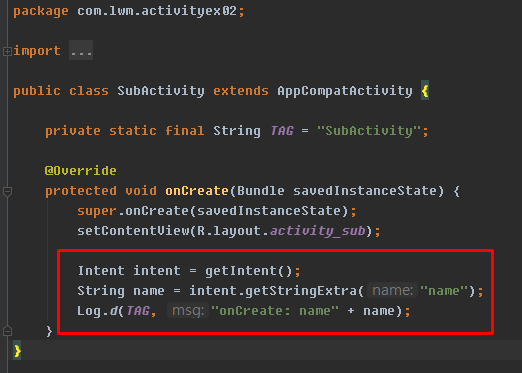
SubActivity
<?xml version="1.0" encoding="utf-8"?>
<androidx.drawerlayout.widget.DrawerLayout
    xmlns:android="http://schemas.android.com/apk/res/android"
    xmlns:app="http://schemas.android.com/apk/res-auto"
    xmlns:tools="http://schemas.android.com/tools"
    android:layout_width="match_parent"
    android:layout_height="match_parent"
    tools:context=".SubActivity">

    <LinearLayout
        android:layout_width="match_parent"
        android:layout_height="match_parent"
        android:background="@color/colorAccent">

        <TextView
            android:layout_width="match_parent"
            android:layout_height="match_parent"
            android:gravity="center"
            android:textSize="60sp"
            android:text="서브 액티비티"/>

    </LinearLayout>

    <com.google.android.material.navigation.NavigationView
        android:id="@+id/nav"
        android:layout_width="wrap_content"
        android:layout_height="match_parent"
        app:menu="@menu/nav_menu"
        android:layout_gravity="start|left"/>

</androidx.drawerlayout.widget.DrawerLayout>
https://lktprogrammer.tistory.com/168
[Android] 안드로이드 - 네비게이션 드로어(Navigation Drawer)를 활용하여 슬라이드 메뉴 구현하기
내비게이션 드로어(Navigation Drawer)는 앱에서 사용 가능한 기능을 탐색할 수 있도록 Menu를 제공하는 화면입니다. 기본적으로 화면의 가장자리에 숨겨져 있으며 왼쪽에서 오른쪽으로 스와이프 동��
lktprogrammer.tistory.com
package com.jaybon.navigationintentex01;

import androidx.annotation.NonNull;
import androidx.appcompat.app.AppCompatActivity;

import android.os.Bundle;
import android.util.Log;
import android.view.MenuItem;
import android.widget.Toast;

import com.google.android.material.navigation.NavigationView;

public class MainActivity extends AppCompatActivity {

    private static final String TAG = "Main_Activity";

    private NavigationView nav;


    @Override
    protected void onCreate(Bundle savedInstanceState) {
        super.onCreate(savedInstanceState);
        setContentView(R.layout.activity_main);

        nav = findViewById(R.id.nav1);

        nav.setNavigationItemSelectedListener(new NavigationView.OnNavigationItemSelectedListener() {
            @Override
            public boolean onNavigationItemSelected(@NonNull MenuItem item) {
                switch (item.getItemId())
                {
                    case R.id.nav_menu1:
                        Log.d(TAG, "onNavigationItemSelected: 확인1");
                        break;
                    case R.id.nav_menu2:
                        Log.d(TAG, "onNavigationItemSelected: 확인2");
                        break;
                }
                return false;
            }
        });


    }
}
(이렇게 리스너 달지 않는다 ! 연습용이었다고함)
--------
SQL라이트 - ORM - ROOM
---------
MVVM - AAC - SQL라이트 패틴
--------
FCM
-------
헬퍼 클래스를 만들어서 리스너 추가
NavigationViewHelper
package com.jaybon.navigationintentex01;

import android.content.Context;
import android.content.Intent;
import android.view.MenuItem;

import androidx.annotation.NonNull;

import com.google.android.material.navigation.NavigationView;

public class NavigationViewHelper {
    public static void enableNavigation(final Context context, NavigationView view){
        view.setNavigationItemSelectedListener(new NavigationView.OnNavigationItemSelectedListener() {
            @Override
            public boolean onNavigationItemSelected(@NonNull MenuItem item) {

                if(item.getItemId() == R.id.nav_menu1){
                    Intent intent = new Intent(context, MainActivity.class);

                    // 싱글탑 플래그 (무조건 1개) 기존것 사용용
                   intent.addFlags(Intent.FLAG_ACTIVITY_SINGLE_TOP);

                    context.startActivity(intent);
                } else if (item.getItemId() == R.id.nav_menu2){
                    Intent intent = new Intent(context, SubActivity.class);

                    intent.addFlags(Intent.FLAG_ACTIVITY_SINGLE_TOP);

                    context.startActivity(intent);
                }

                return true;
            }
        });
    }
}
플래그도 추가하자
MainActivity
package com.jaybon.navigationintentex01;

import androidx.annotation.NonNull;
import androidx.appcompat.app.AppCompatActivity;

import android.content.Context;
import android.content.Intent;
import android.os.Bundle;
import android.util.Log;
import android.view.MenuItem;
import android.widget.Toast;

import com.google.android.material.navigation.NavigationView;

public class MainActivity extends AppCompatActivity {

    // 아래 두가지는 무조건 만들자
    private static final String TAG = "Main_Activity";
    private Context mContext = MainActivity.this;

    private NavigationView nav;


    @Override
    protected void onNewIntent(Intent intent) { // 싱글탑 플래그일 경우 사용하던 것을 또 사용
        super.onNewIntent(intent);
        Log.d(TAG, "onNewIntent: 호출됨");
    }

    @Override
    protected void onCreate(Bundle savedInstanceState) {
        super.onCreate(savedInstanceState);
        setContentView(R.layout.activity_main);

        // 컴포넌트들 가져오기
        init();

        // 네비게이션 메뉴들에 리스너 추가
        NavigationViewHelper.enableNavigation(mContext, nav);

    }

    private void init(){
        nav = findViewById(R.id.nav1);
    }
}
현재페이지를 또가면
--------------------
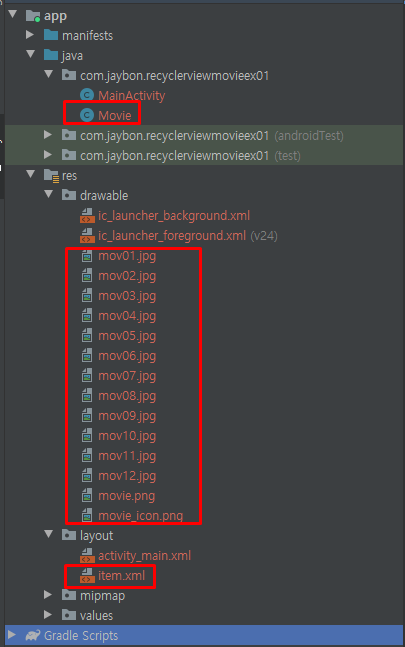
영화 포스터 앱 만들기(미완)
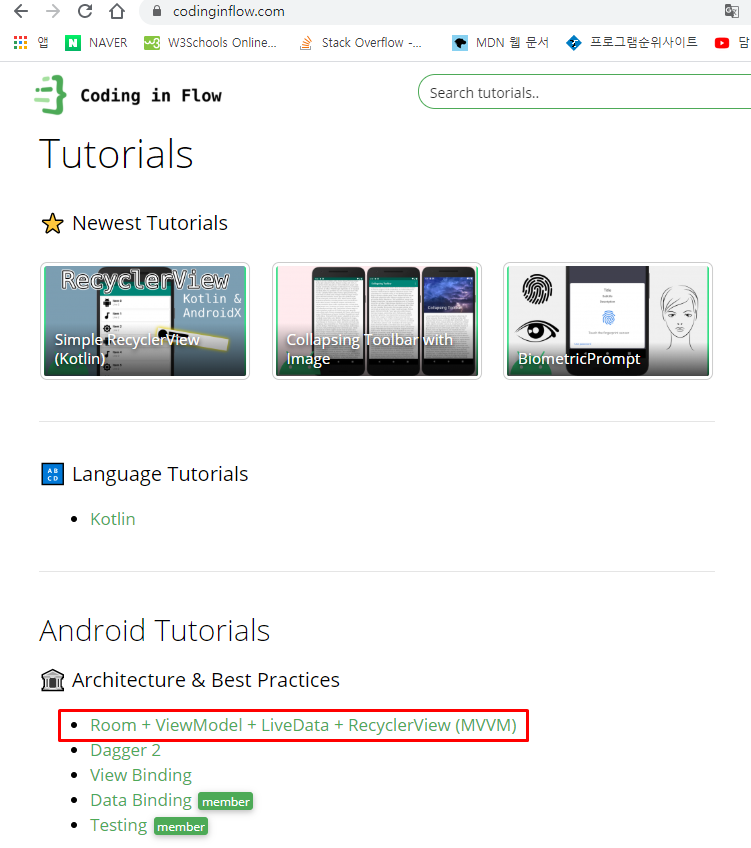
https://blog.naver.com/getinthere/221694612498
안드로이드 3강 - (1) ListView와 GridView와 어댑터를 이용한 영화 포스터 앱 만들기
1. 리스트뷰 연습1+클릭이벤트- ListTest1 프로젝트activity_main.xmlMainActivity.java2. 리스트뷰 연...
blog.naver.com
토스트 - 컨텍스트 이용
스낵바 - 뷰를 이용하여 컨텍스트를 찾음
대화상자 - 컨텍스트가 필요 없다 ( 새로운 윈도우가 뜬다 )
뷰만 알면 컨텍스트를 알 수 있다
Test
더보기
package com.jaybon.listviewex01; import android.content.Context; import android.widget.Toast; public class Test {public static void callToast (Context context){makeText (context, " 안녕 " , Toast.LENGTH_SHORT ).show(); }
MainActivity
package com.jaybon.listviewex01;

import androidx.appcompat.app.AppCompatActivity;

import android.content.Context;
import android.os.Bundle;
import android.widget.Toast;

public class MainActivity extends AppCompatActivity {

    private Context mContext = MainActivity.this;

    @Override
    protected void onCreate(Bundle savedInstanceState) {
        super.onCreate(savedInstanceState);
        setContentView(R.layout.activity_main);

        Test.callToast(mContext);

    }
}
-------------------------------------
스낵바는 뷰 위에
Test
package com.jaybon.listviewex01;

import android.content.Context;
import android.widget.Toast;

public class Test {

    public static void callToast(Context context){

        Toast.makeText(context, "안녕", Toast.LENGTH_SHORT).show();

    }

}
MainActivity
package com.jaybon.listviewex01;

        import androidx.appcompat.app.AppCompatActivity;

        import android.content.Context;
        import android.os.Bundle;
        import android.widget.TextView;
        import android.widget.Toast;

        import com.google.android.material.snackbar.Snackbar;

public class MainActivity extends AppCompatActivity {

    private TextView tv1;

    private Context mContext = MainActivity.this;

    @Override
    protected void onCreate(Bundle savedInstanceState) {
        super.onCreate(savedInstanceState);
        setContentView(R.layout.activity_main);

        tv1 = findViewById(R.id.tv1);


        // 토스트
        Test.callToast(mContext);

        // 스넥바에 텍스트뷰를 넣어보았다
        Snackbar.make(tv1, "Text to display", Snackbar.LENGTH_LONG).show();

    }
}
225페이지
------------
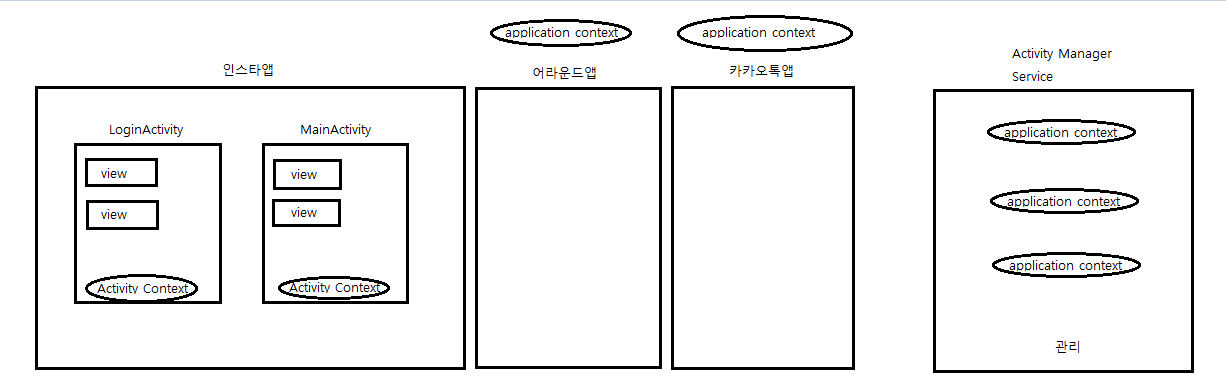
액티비티 매니저 서비스
애플리케이션 컨텍스트 - 모든 액티비티 컨텍스트를 가지고 있다// 아이디를 가지고 있다
액티비티 컨텍스트 - 액티비티 내의 모든 내용을 가지고 있다
뷰 - 역으로 액티비티 컨텍스트, 애플리케이션 컨텍스트를 알 수 있다
getApplicationContext()
컨텐트 프로바이더 - 다른앱이 들고 있는 데이터에 접근 할 수 있다.
내 휴대폰 안의 앱들이 데이터를 공유하도록 하게 하는 것
-------
뷰모델 - 여러가지 뷰가 섞인 것
------
알림 대화상자
package com.jaybon.listviewex01;

        import androidx.appcompat.app.AlertDialog;
        import androidx.appcompat.app.AppCompatActivity;

        import android.content.Context;
        import android.content.DialogInterface;
        import android.os.Bundle;
        import android.view.View;
        import android.widget.Button;
        import android.widget.TextView;
        import android.widget.Toast;

        import com.google.android.material.snackbar.Snackbar;

public class MainActivity extends AppCompatActivity {

    private TextView tv1;
    private Button button;

    private Context mContext = MainActivity.this;

    @Override
    protected void onCreate(Bundle savedInstanceState) {
        super.onCreate(savedInstanceState);
        setContentView(R.layout.activity_main);

        tv1 = findViewById(R.id.tv1);
        button = findViewById(R.id.button);
        button.setOnClickListener(new View.OnClickListener() {
            @Override
            public void onClick(View v) {
                showMessage();
            }
        });


        // 토스트
        Test.callToast(mContext);

        // 스넥바에 텍스트뷰를 넣어보았다
        Snackbar.make(tv1, "Text to display", Snackbar.LENGTH_LONG).show();

    }

    private void showMessage(){
        AlertDialog.Builder builder = new AlertDialog.Builder(this);
        builder.setTitle("안내");
        builder.setMessage("종료하시겠습니까?");

        builder.setPositiveButton("예", new DialogInterface.OnClickListener() {
            @Override
            public void onClick(DialogInterface dialog, int which) {
                String message = "예 버튼이 눌렸습니다.";
                tv1.setText(message);
            }
        });

        builder.setNeutralButton("취소", new DialogInterface.OnClickListener() {
            @Override
            public void onClick(DialogInterface dialog, int which) {
                String message = "취소 버튼이 눌렸습니다.";
                tv1.setText(message);
            }
        });

        builder.setNegativeButton("아니오", new DialogInterface.OnClickListener() {
            @Override
            public void onClick(DialogInterface dialog, int which) {
                String message = "아니오 버튼이 눌렸습니다.";
                tv1.setText(message);
            }
        });

        AlertDialog dialog = builder.create();
        dialog.show();

    }
}
------------------
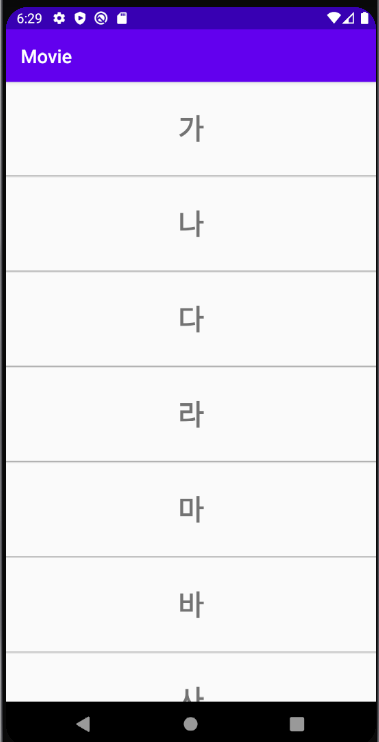
리스트 뷰
activity_main.xml
<?xml version="1.0" encoding="utf-8"?>
<LinearLayout
    xmlns:android="http://schemas.android.com/apk/res/android"
    xmlns:app="http://schemas.android.com/apk/res-auto"
    xmlns:tools="http://schemas.android.com/tools"
    android:layout_width="match_parent"
    android:layout_height="match_parent"
    tools:context=".MainActivity">

    <ListView
        android:id="@+id/list_view"
        android:layout_width="match_parent"
        android:layout_height="match_parent" />

</LinearLayout>
지금 스크롤뷰가 아닌 리스트뷰를 쓰는 이유
스크롤 뷰는 건수를 다 출력하기 때문에 부하가 너무많다
향상된 버전이 리스트 뷰
리스트 뷰는 화면의 높이를 계산하고 하나의 아이템의 높이를 계산한다
이후에는 리사이클러 뷰를 사용한다 (스크롤뷰 -> 리스트뷰 -> 리사이클러뷰)
-----------
어댑터패턴 - 강제성이 없다
-----------
어댑터가 들고 있는 것
스크롤뷰는 리스트뷰에 어댑터 패턴을 쓸 수 있도록 한 것이다
MainActivity
package com.jaybon.movie;

import androidx.appcompat.app.AppCompatActivity;

import android.content.Context;
import android.os.Bundle;
import android.widget.ArrayAdapter;
import android.widget.ListView;

import java.util.Arrays;
import java.util.List;

public class MainActivity extends AppCompatActivity {

    private static final String TAG = "Main_Activity";
    private Context mContext = MainActivity.this;
    private ListView listView;

    private ArrayAdapter<String> adapter; // 나중에는 안쓴다
    private List<String> mid = Arrays.asList(
            "가","나","다","라","마","바","사","아",
            "가","나","다","라","마","바","사","아",
            "가","나","다","라","마","바","사","아",
            "가","나","다","라","마","바","사","아"
    );

    @Override
    protected void onCreate(Bundle savedInstanceState) {
        super.onCreate(savedInstanceState);
        setContentView(R.layout.activity_main);

        listView = findViewById(R.id.list_view);

        // 어댑터는 액티비티/  디자인(사이즈) / 데이터
        adapter = new ArrayAdapter<>(mContext, android.R.layout.simple_list_item_1, mid);
        listView.setAdapter(adapter);

    }
}
15개의 인플레이터 된 데이터가 있다 (화면에 보이지 않는 것들은 화면을 그쪽으로 이동하면 인플레이터 된다)
----------------
item.xml
<?xml version="1.0" encoding="utf-8"?>
<RelativeLayout
    xmlns:android="http://schemas.android.com/apk/res/android"
    android:layout_width="match_parent"
    android:layout_height="100dp">

    <TextView
        android:id="@+id/tv_title"
        android:layout_width="match_parent"
        android:layout_height="99dp"
        android:text="의미없음"
        android:textSize="30sp"
        android:textStyle="bold"
        android:gravity="center"/>

    <View
        android:layout_below="@id/tv_title"
        android:layout_width="match_parent"
        android:layout_height="1"
        android:background="@android:color/darker_gray"/>

</RelativeLayout>
SingleAdapter
package com.jaybon.movie;

import android.text.Layout;
import android.util.Log;
import android.view.LayoutInflater;
import android.view.View;
import android.view.ViewGroup;
import android.widget.BaseAdapter;
import android.widget.TextView;

import org.w3c.dom.Text;

import java.util.ArrayList;
import java.util.List;

public class SingleAdapter extends BaseAdapter {

    private static final String TAG = "SingleAdapter";

    // 데이터
    private List<String> items = new ArrayList<>();

    // 모든건수 받기
    public void addItems(List<String> items){
        this.items = items;
    }

    // 한건씩 받기 생략

    // getCount과 getItem는 필수!

    @Override
    public int getCount() { // 데이터 사이즈, 최초에 화면을 몇건 만들 것인지
        Log.d(TAG, "getCount: ");
        return items.size();
    }

    @Override
    public Object getItem(int position) { // 아이템 가져오기
        Log.d(TAG, "getItem: ");
        return items.get(position);
    }

    @Override
    public long getItemId(int position) {
        Log.d(TAG, "getItemId: ");
        return 0;
    }


    // 집중!
    @Override
    public View getView(int position, View convertView, ViewGroup parent) { // 포지션값은 제일 밑에 값
        Log.d(TAG, "getView: " +position);

        LayoutInflater inflater = LayoutInflater.from(parent.getContext()); // 인플레이터
        View itemView = inflater.inflate(R.layout.item, parent, false); //아이템뷰
        TextView tv = itemView.findViewById(R.id.tv_title); //뷰에서 텍스트뷰 찾기
        tv.setText(getItem(position).toString());

        return itemView;
    }
}
MainActivity
package com.jaybon.movie;

import androidx.appcompat.app.AppCompatActivity;

import android.content.Context;
import android.os.Bundle;
import android.widget.ArrayAdapter;
import android.widget.ListView;

import java.util.Arrays;
import java.util.List;

public class MainActivity extends AppCompatActivity {

    private static final String TAG = "Main_Activity";
    private Context mContext = MainActivity.this;
    private ListView listView;
    private  SingleAdapter adapter;

    private List<String> mid = Arrays.asList(
            "가","나","다","라","마","바","사","아",
            "가","나","다","라","마","바","사","아",
            "가","나","다","라","마","바","사","아",
            "가","나","다","라","마","바","사","아"
    );

    @Override
    protected void onCreate(Bundle savedInstanceState) {
        super.onCreate(savedInstanceState);
        setContentView(R.layout.activity_main);

        listView = findViewById(R.id.list_view);
        adapter = new SingleAdapter();
        adapter.addItems(mid);
        listView.setAdapter(adapter);

    }
}